Saturday, December 28, 2013

The Polar Express Birthday Party

And, so, the month of December is coming to an end....it has been a busy one this year with two late December birthdays for both of my boys and Christmas following four days later. I was at a loss as to what to do for the boys' birthday party this year, but, it seems like the fifth birthday is the first birthday that we really remember, and with the baby turning one, we needed to do something. I had heard of a place about an hour away from me that did a steam engine birthday party where the kids get to take an hour long steam engine train ride which sounded right up our ally, but, apparently they don't return phone calls or emails. So, moving on, I decided that these ever popular Polar Express Train rides might be just what we were looking to do. And, I found one....three hours away that cost $45/person....even the baby.....and yet, I was still willing. But, they are sold out until 2014. So, again, it is early December, I have less than three weeks to make a birthday party appear out of thin air, I don't even have time to order invitations at this point, and Christmas is taking all my spare time!! I kept going with the train idea....a train party of some sort....and of course, the Polar Express is on every fifteen minutes at my house!! So, I googled Polar Express Party images and found so many helpful ideas. I had my party and we were able to put it together for under $250 and in just a couple of days. I was even able to find a Santa who was available and was literally the icing on the cake!! A special thanks to Sassaby at Etsy for her absolutely darling invitations that I could print and edit from my home computer (https://img1.etsystatic.com/043/0/6228712/il_570xN.526949413_bi9h.jpg). Also, a special thank you to nestlingdesigns.blogspot.com for her insight on the Polar Express movie night she had at her house....you were my inspiration!!
Polar Express Birthday Collection Red & Green - DIY PRINTABLE FILES - Christmas Printables by Sassaby
 I also borrowed some ideas from the googled images and free printables that I found there...
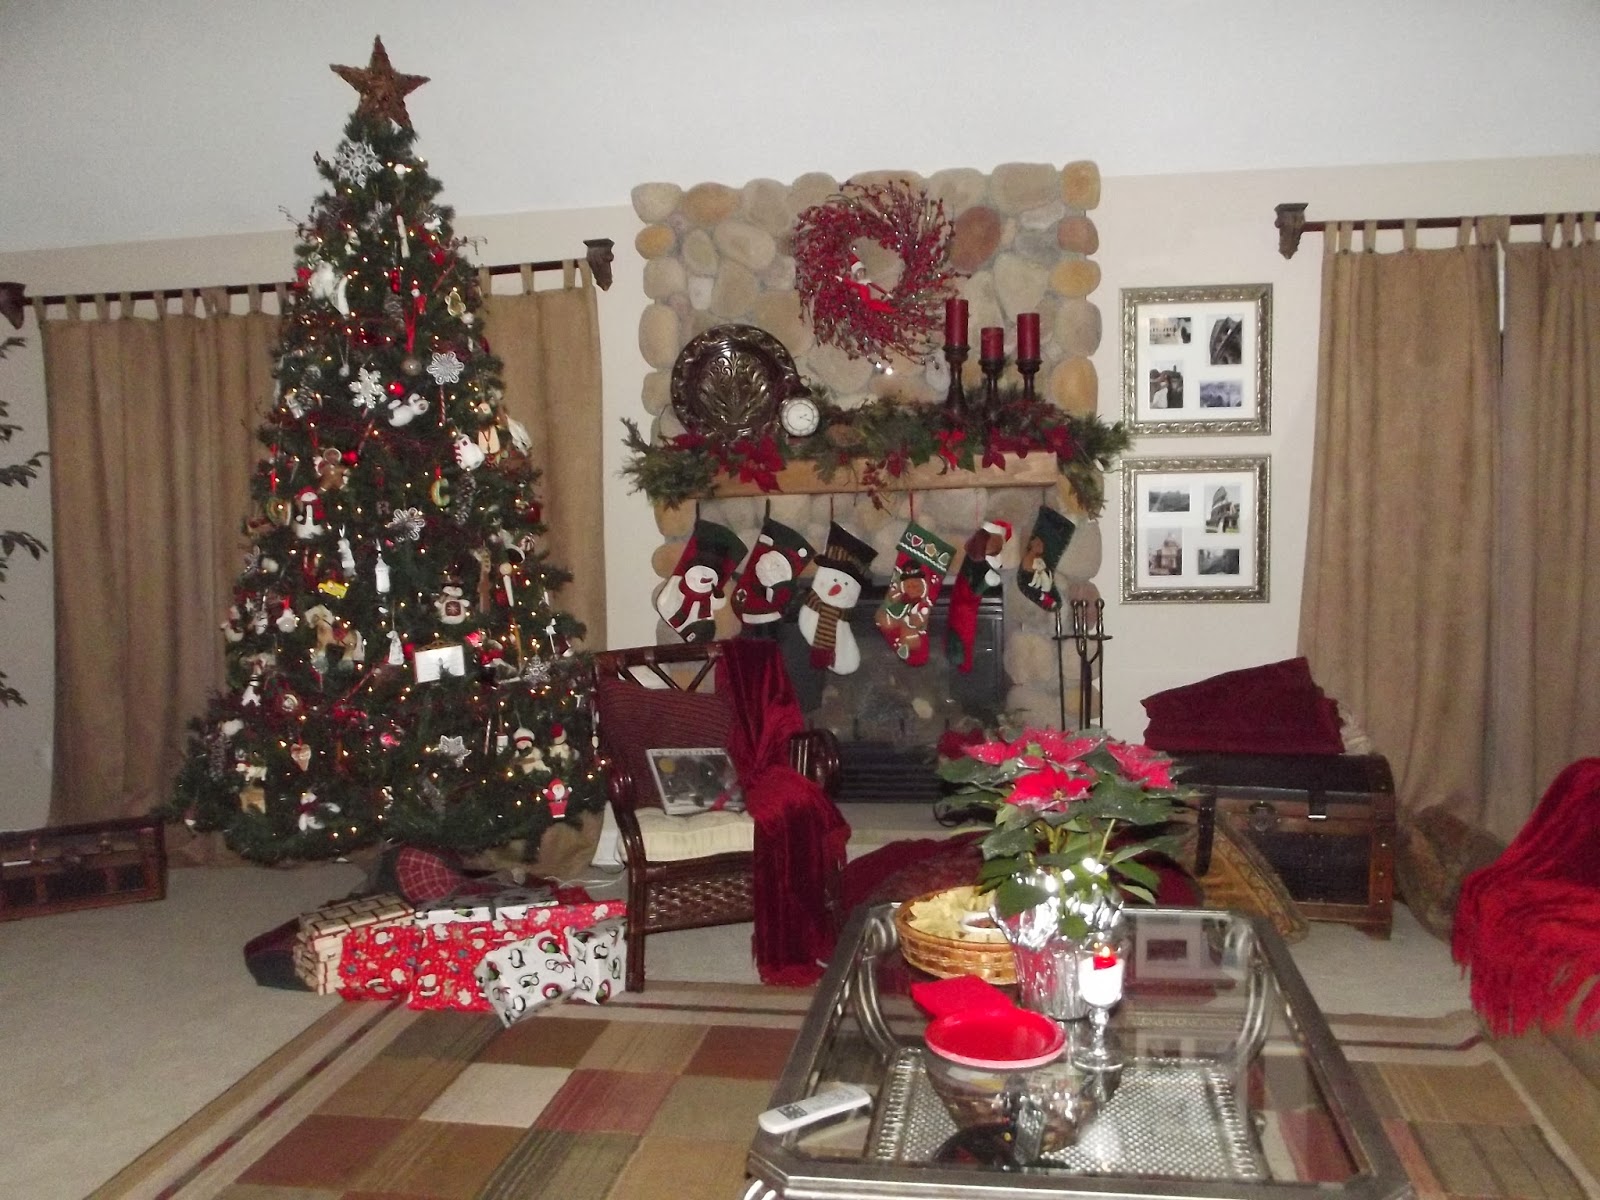
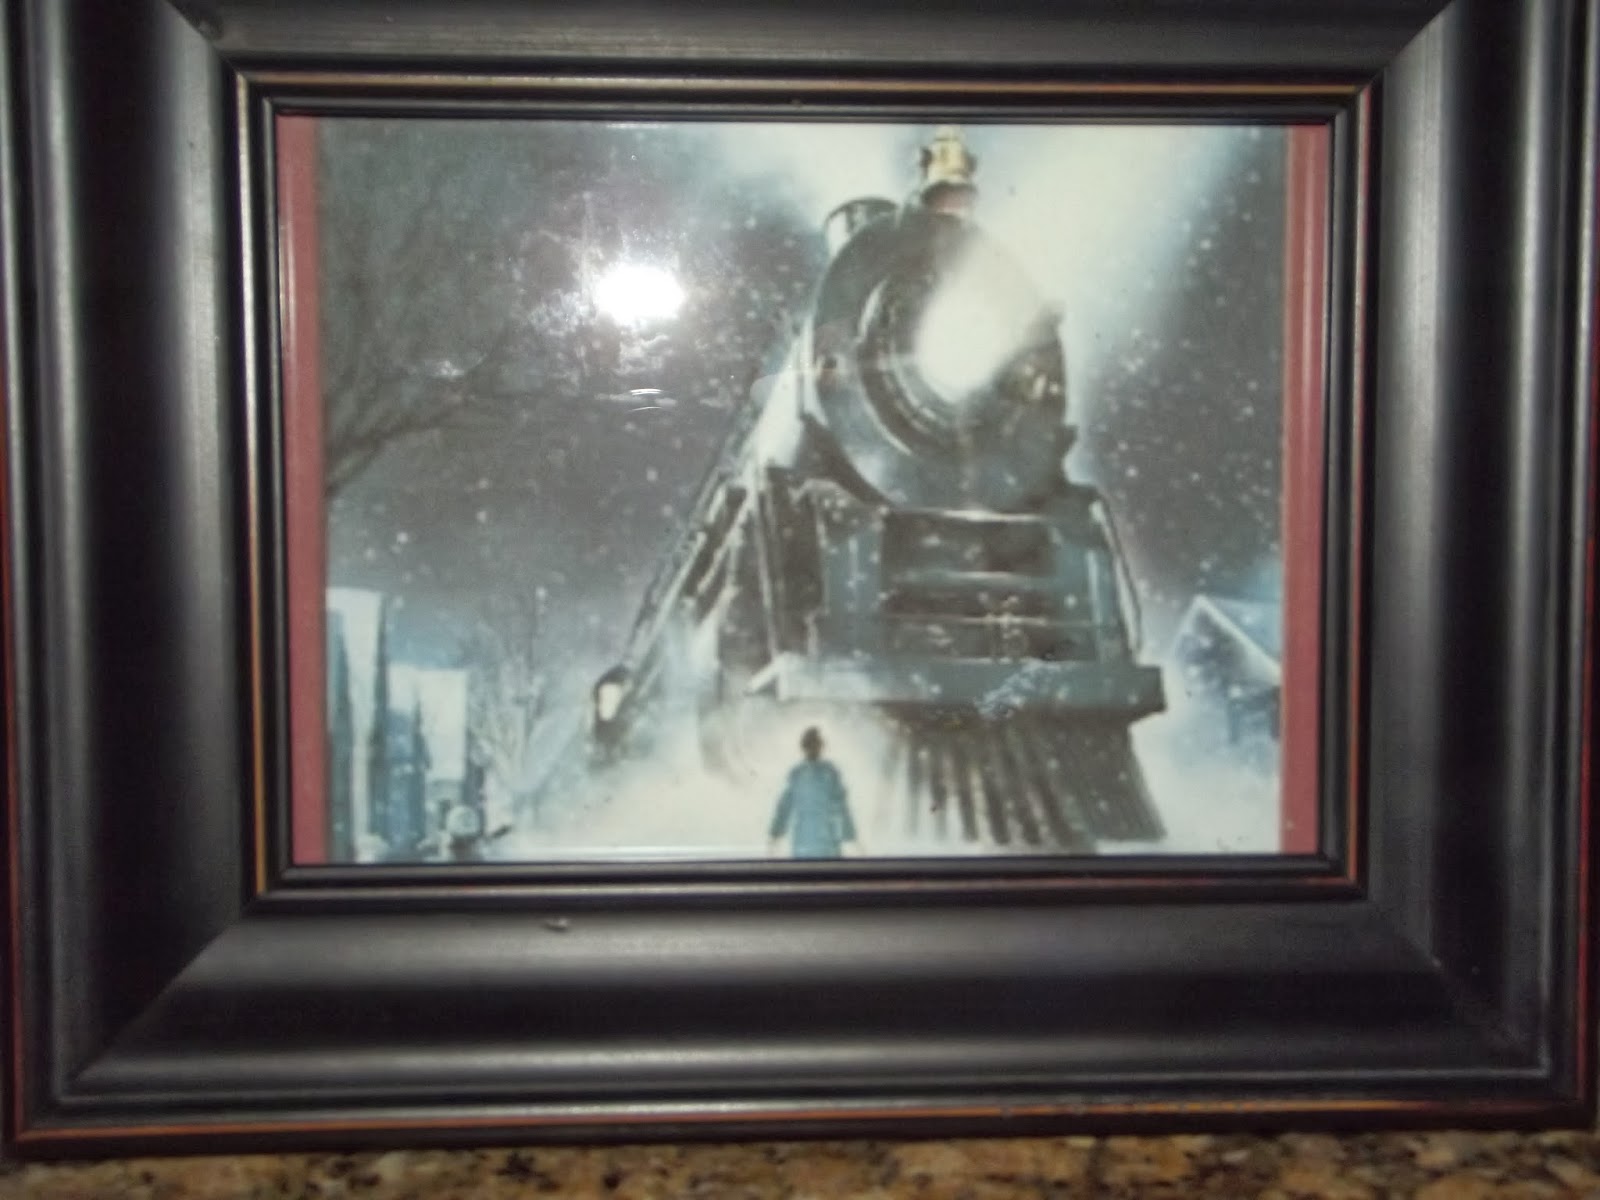
 Poinsettias, candles with fake snow, a snowflake tablecloth and framed images of The Polar Express movie made for some festive and easy decorations.
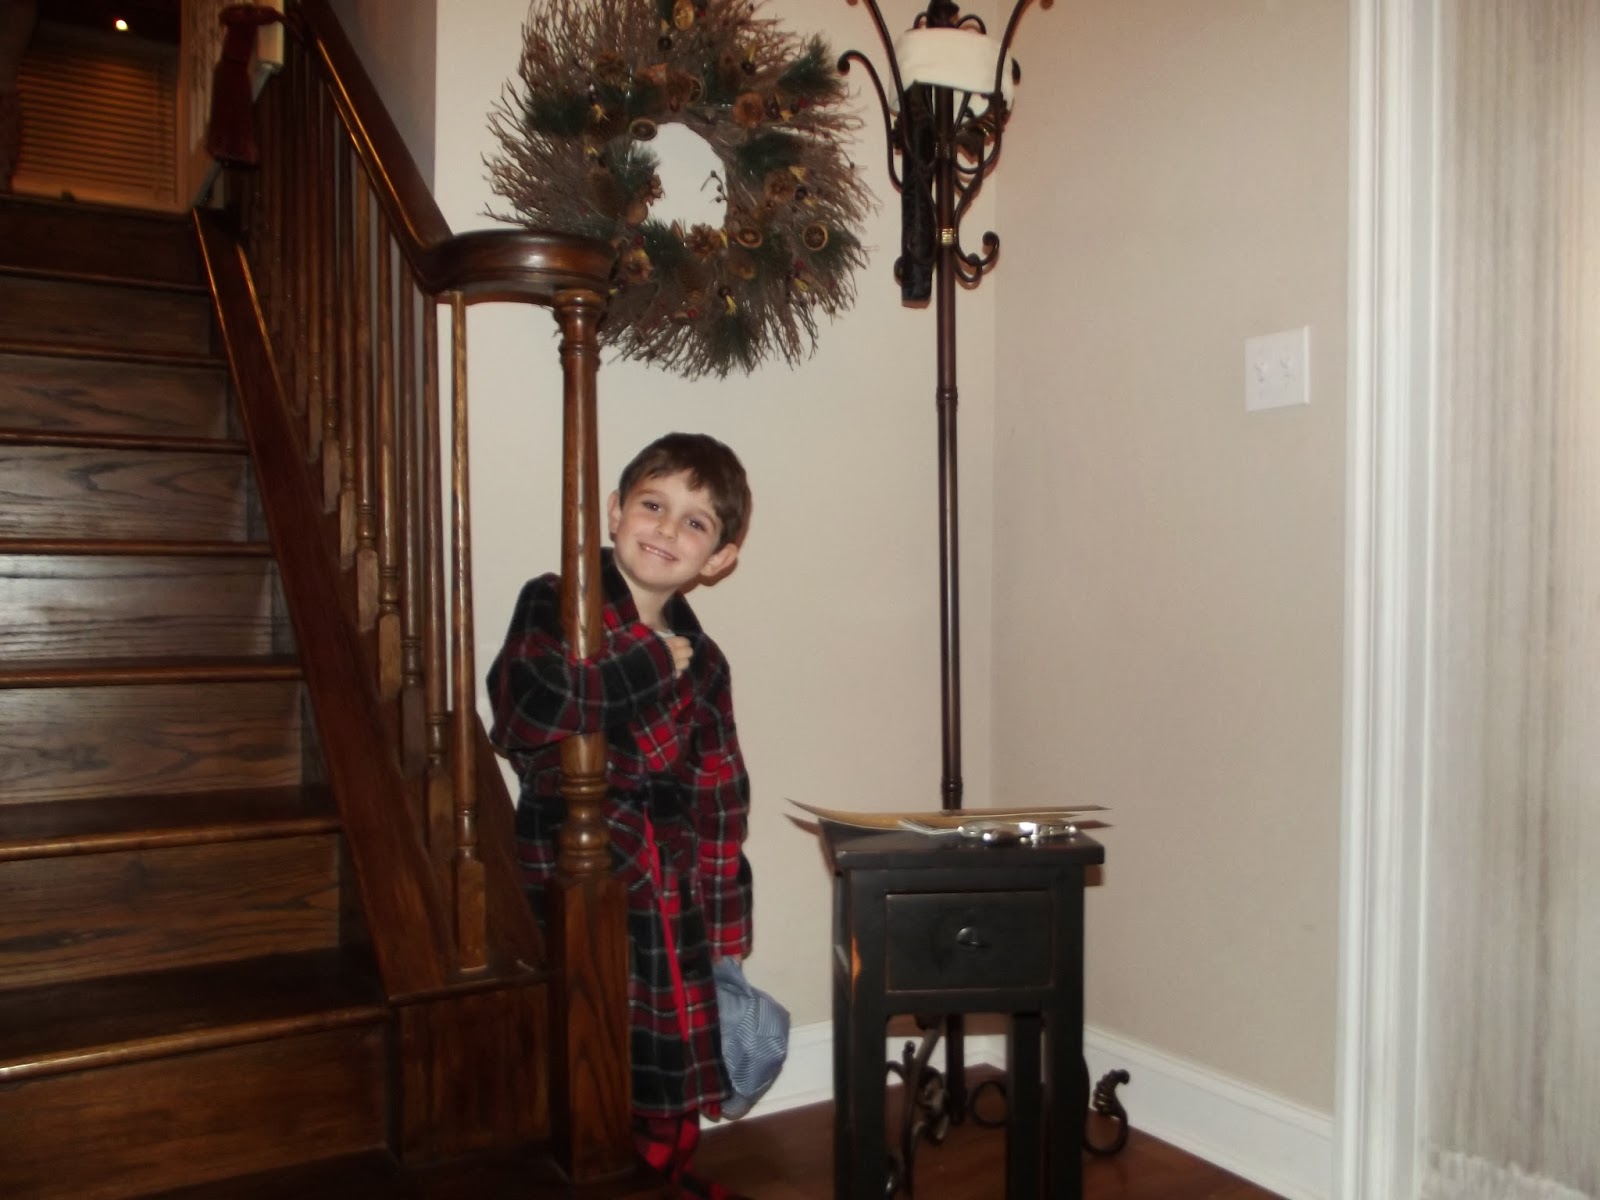
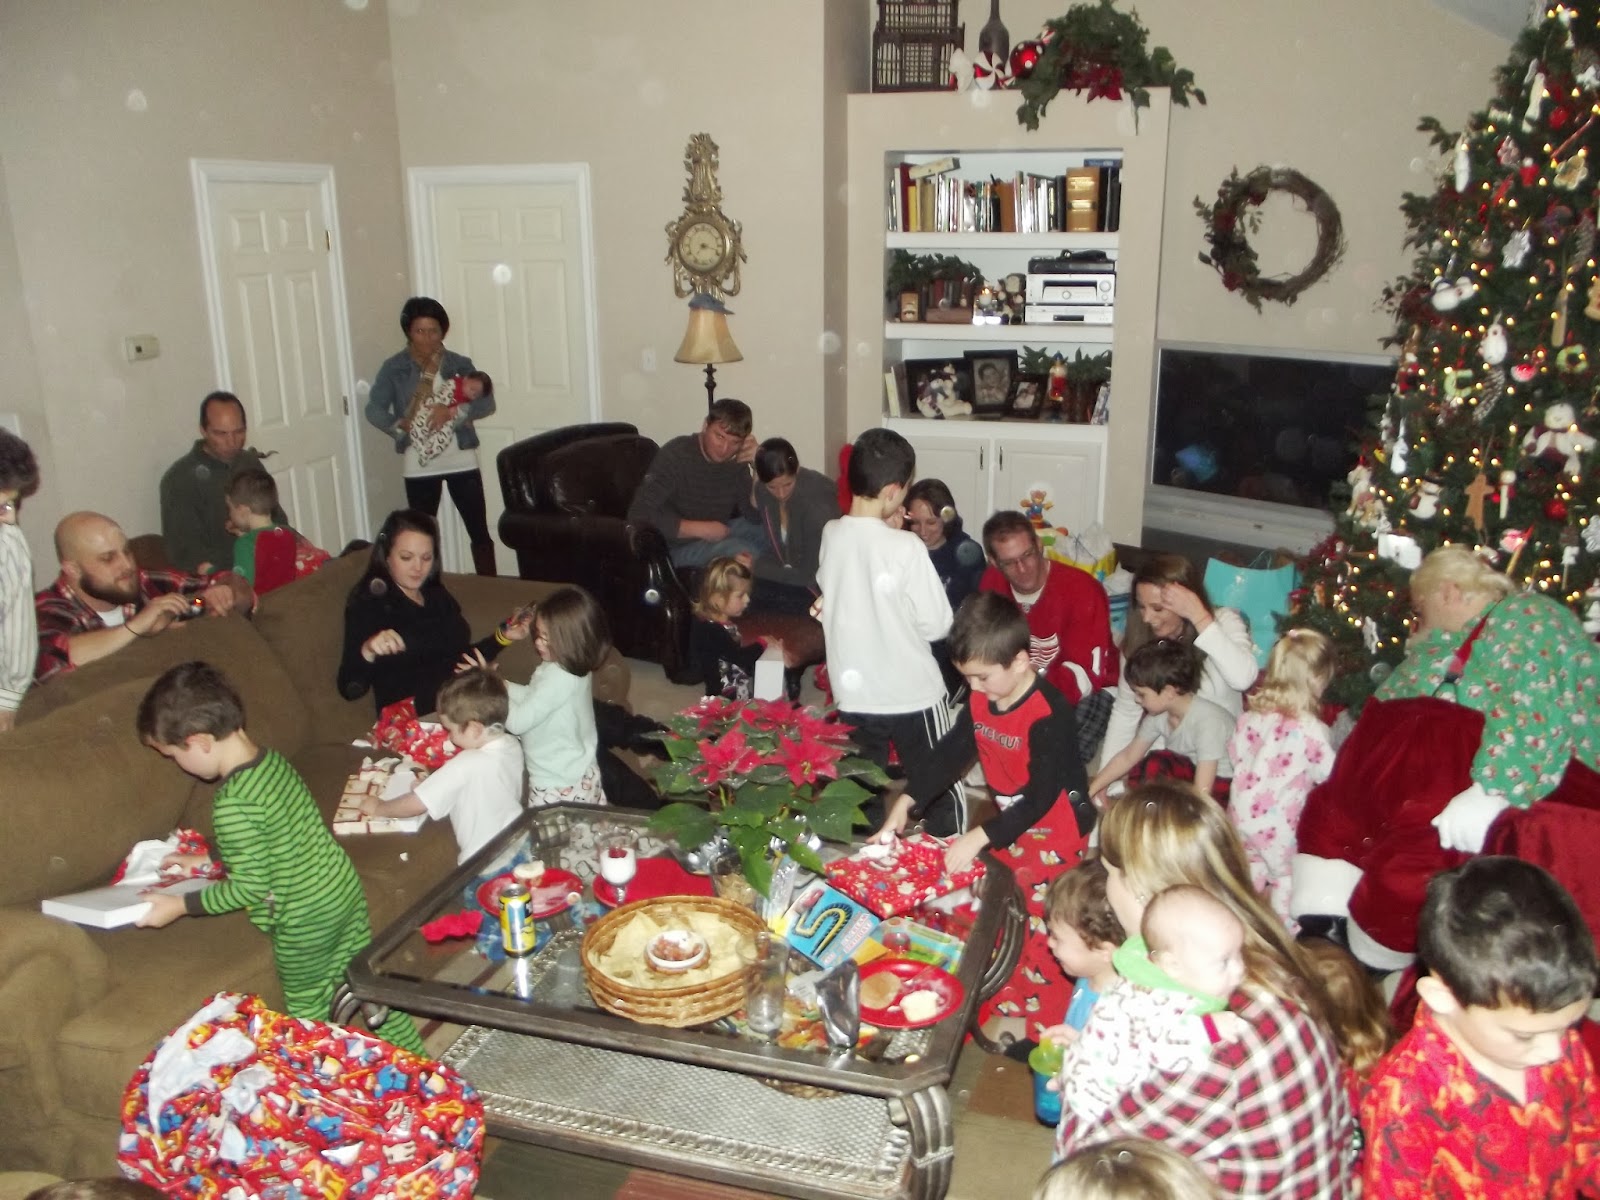
 Such easy decor at Christmas time...most of the work was already done. Here is the scene before the chaos began. If you look closely, Casper, our elf on the shelf, is up in the wreath.....always watching....and the gifts under the tree were the party favors for Santa to hand out.
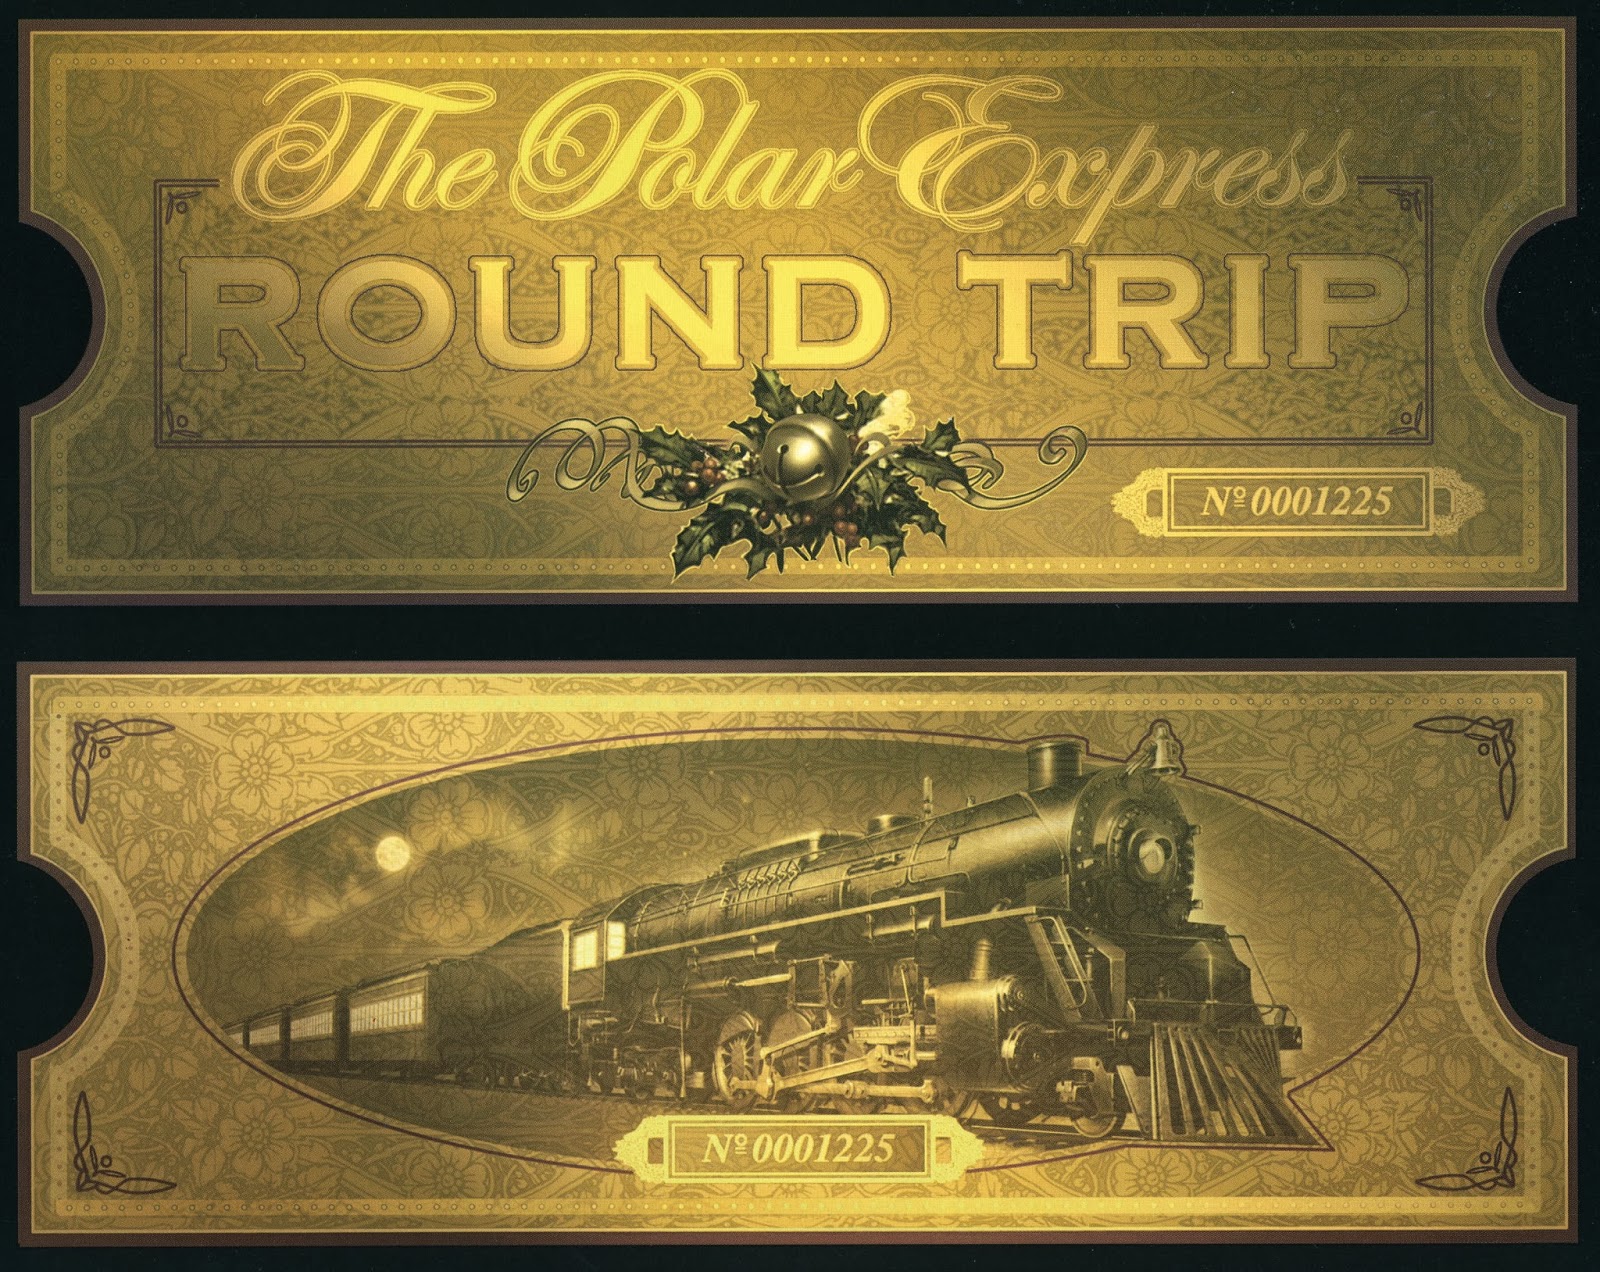
 Free printable....

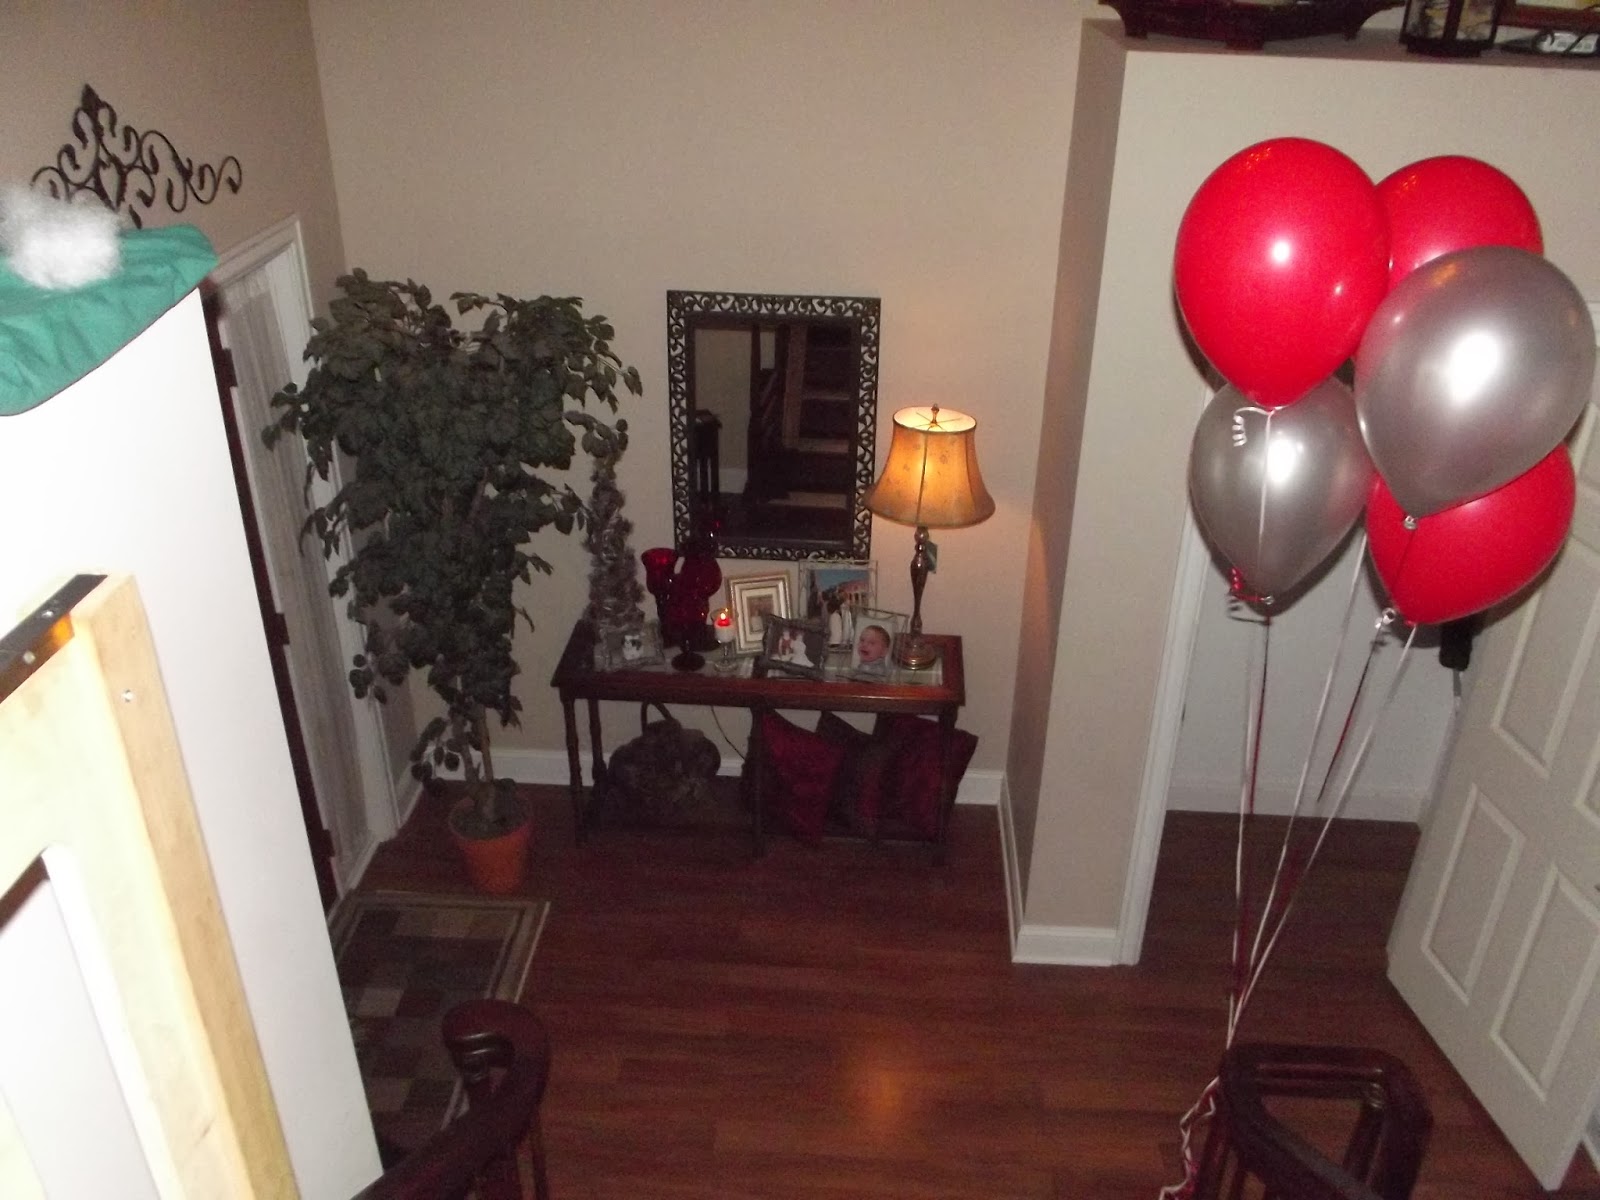
 Balloons were the only true "birthday" decoration that I had.....
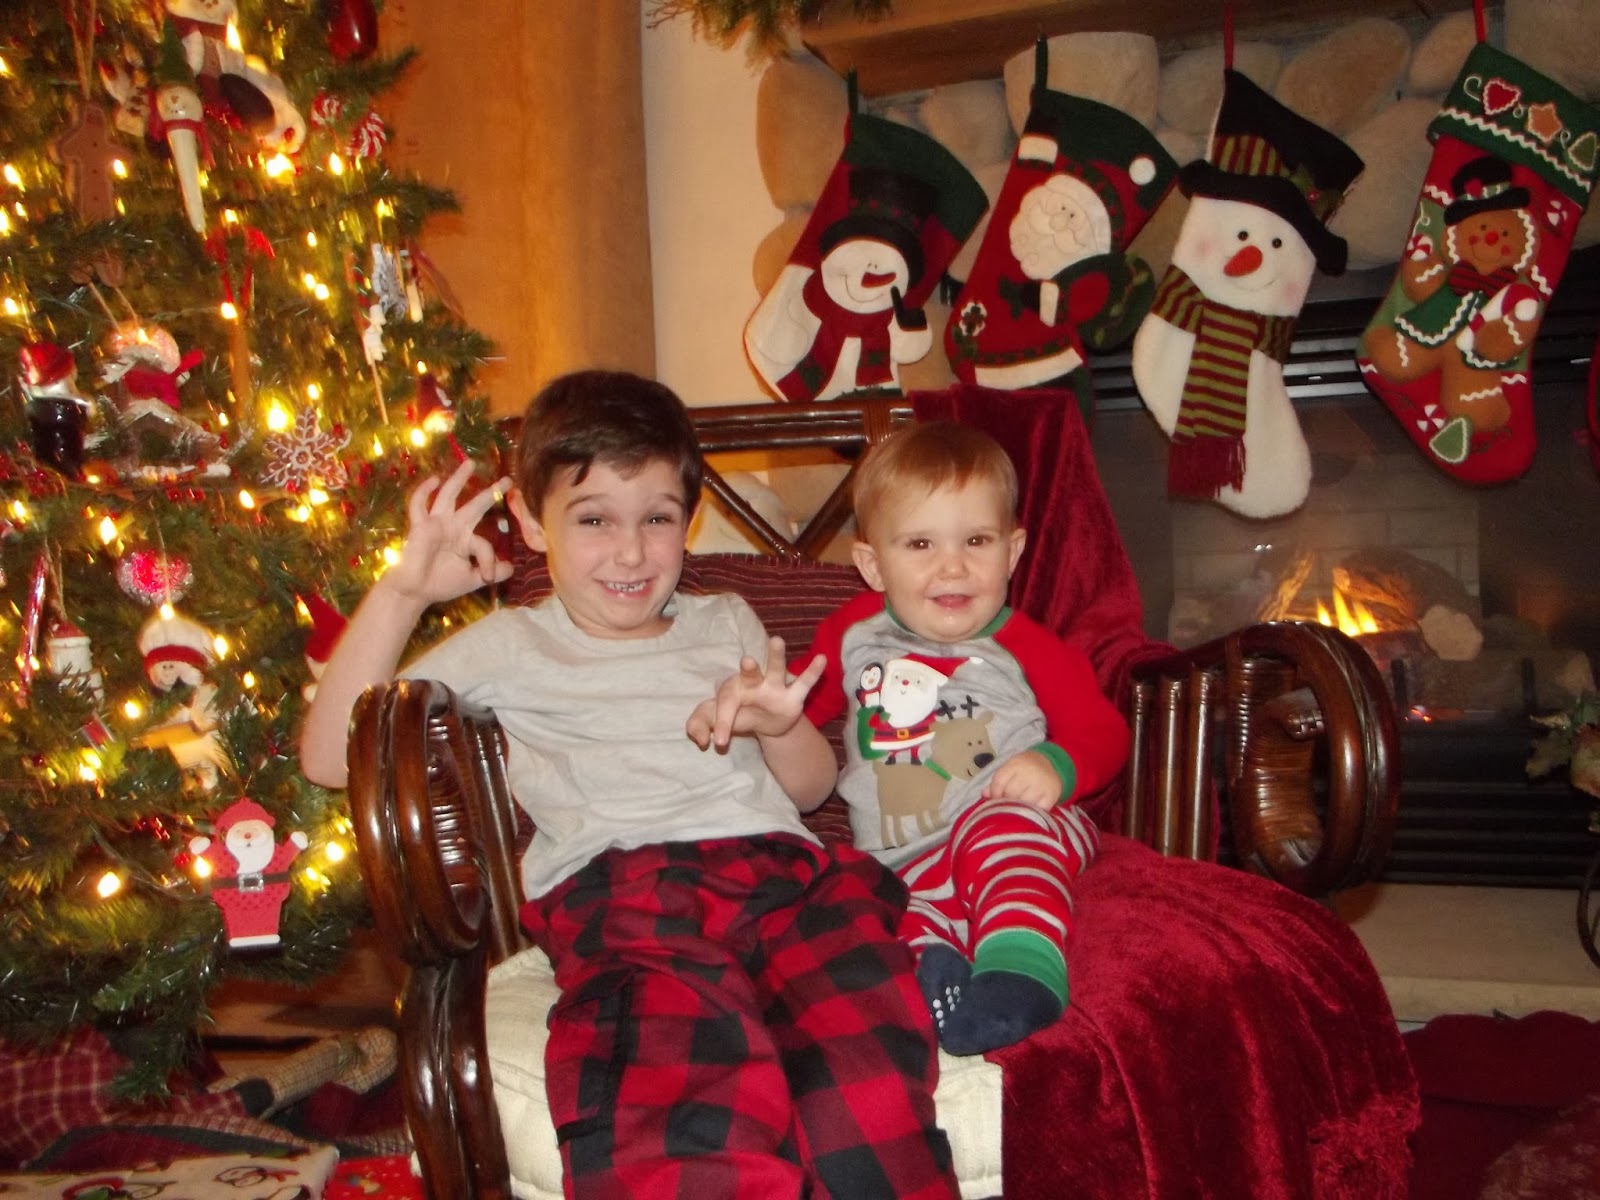
 My boys....Gabriel (5) and Liam(1)....Happy Birthday boys!!
 There is the elf, Casper!!

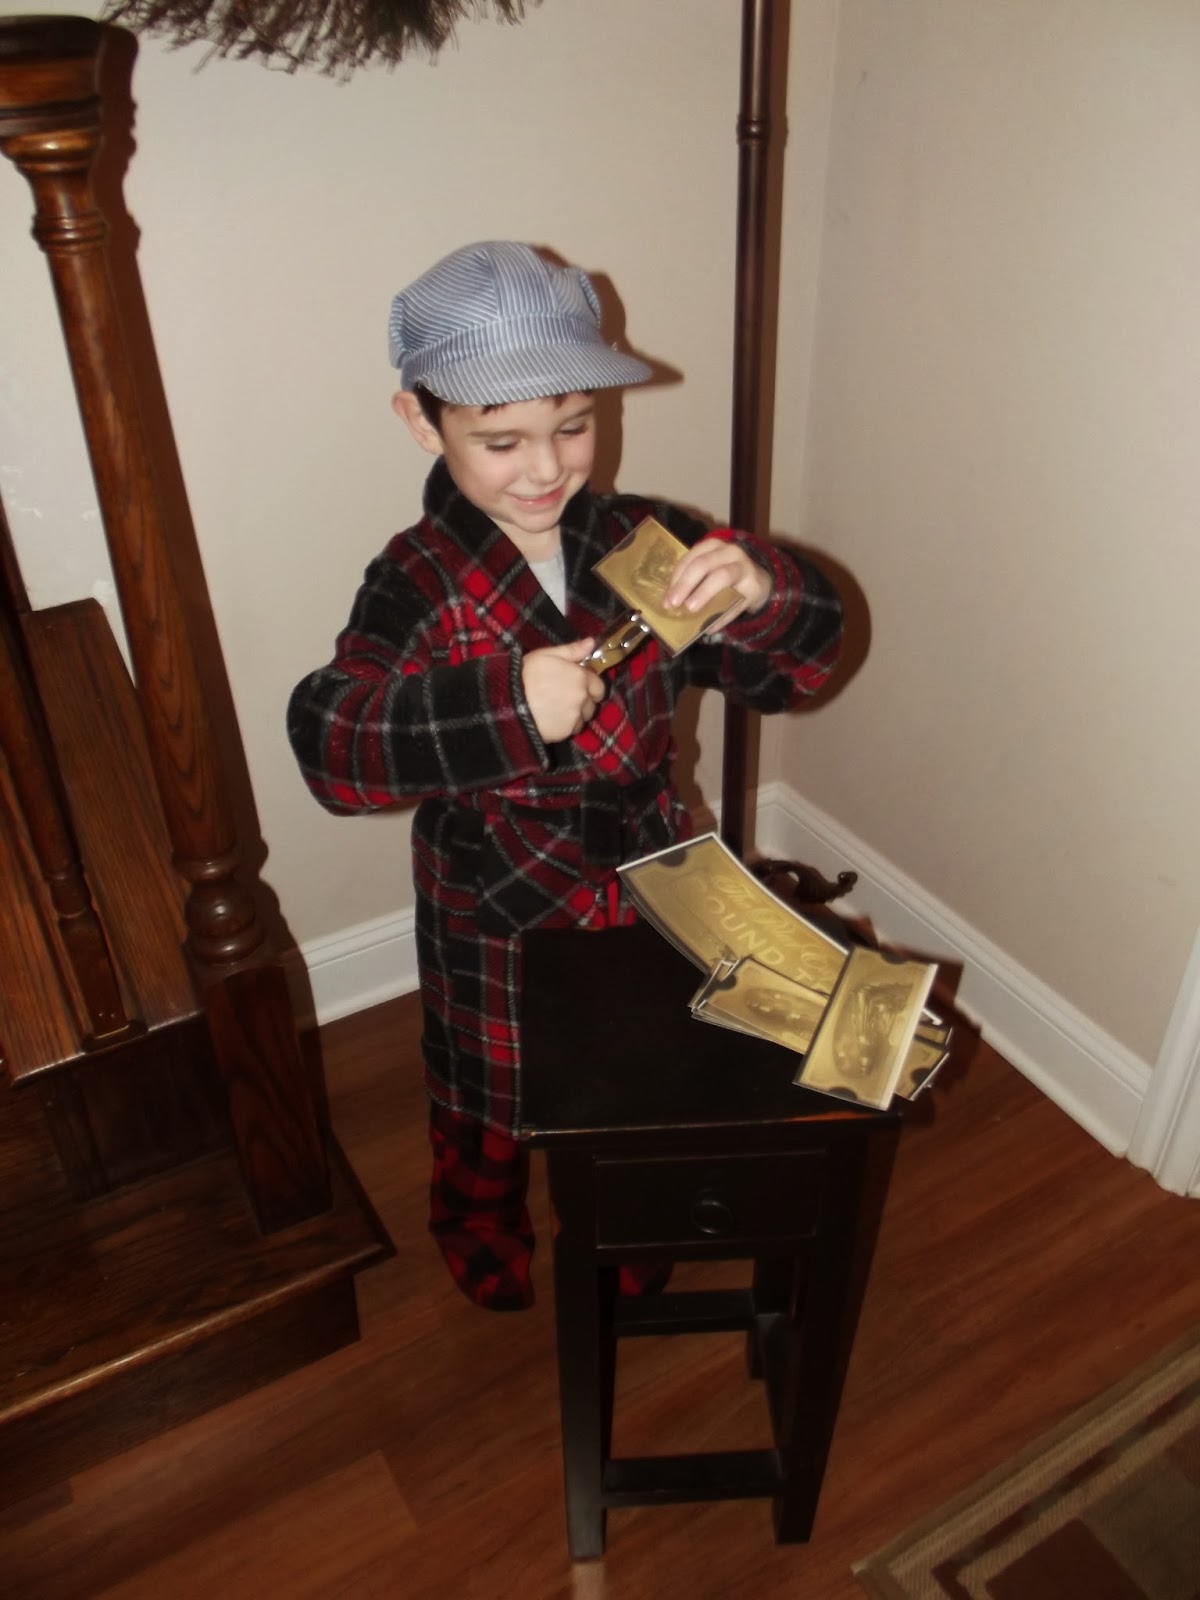
 Gabriel insisted that each guest receive a golden ticket. He punched the golden ticket as they arrived and said "All Aboard" and even had his pocket watch....
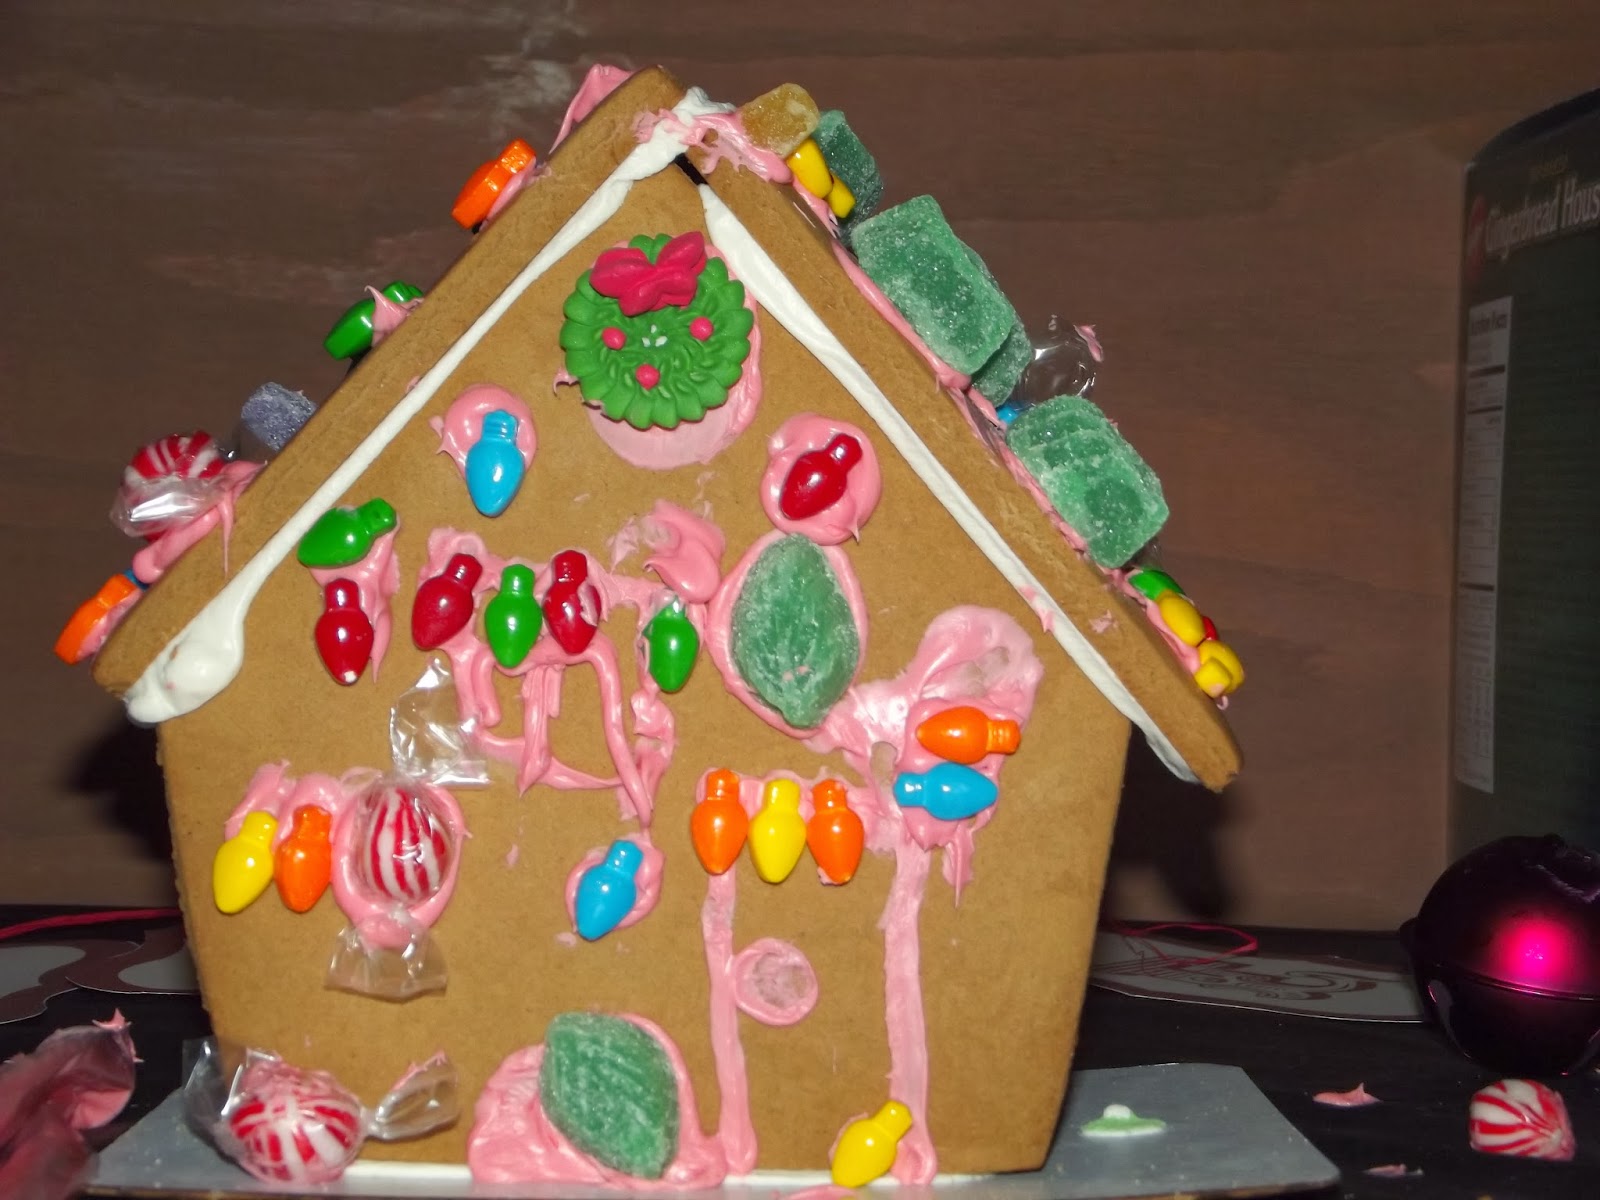
 We had gingerbread houses to decorate.....and yes, these kids are all in their jammies!!


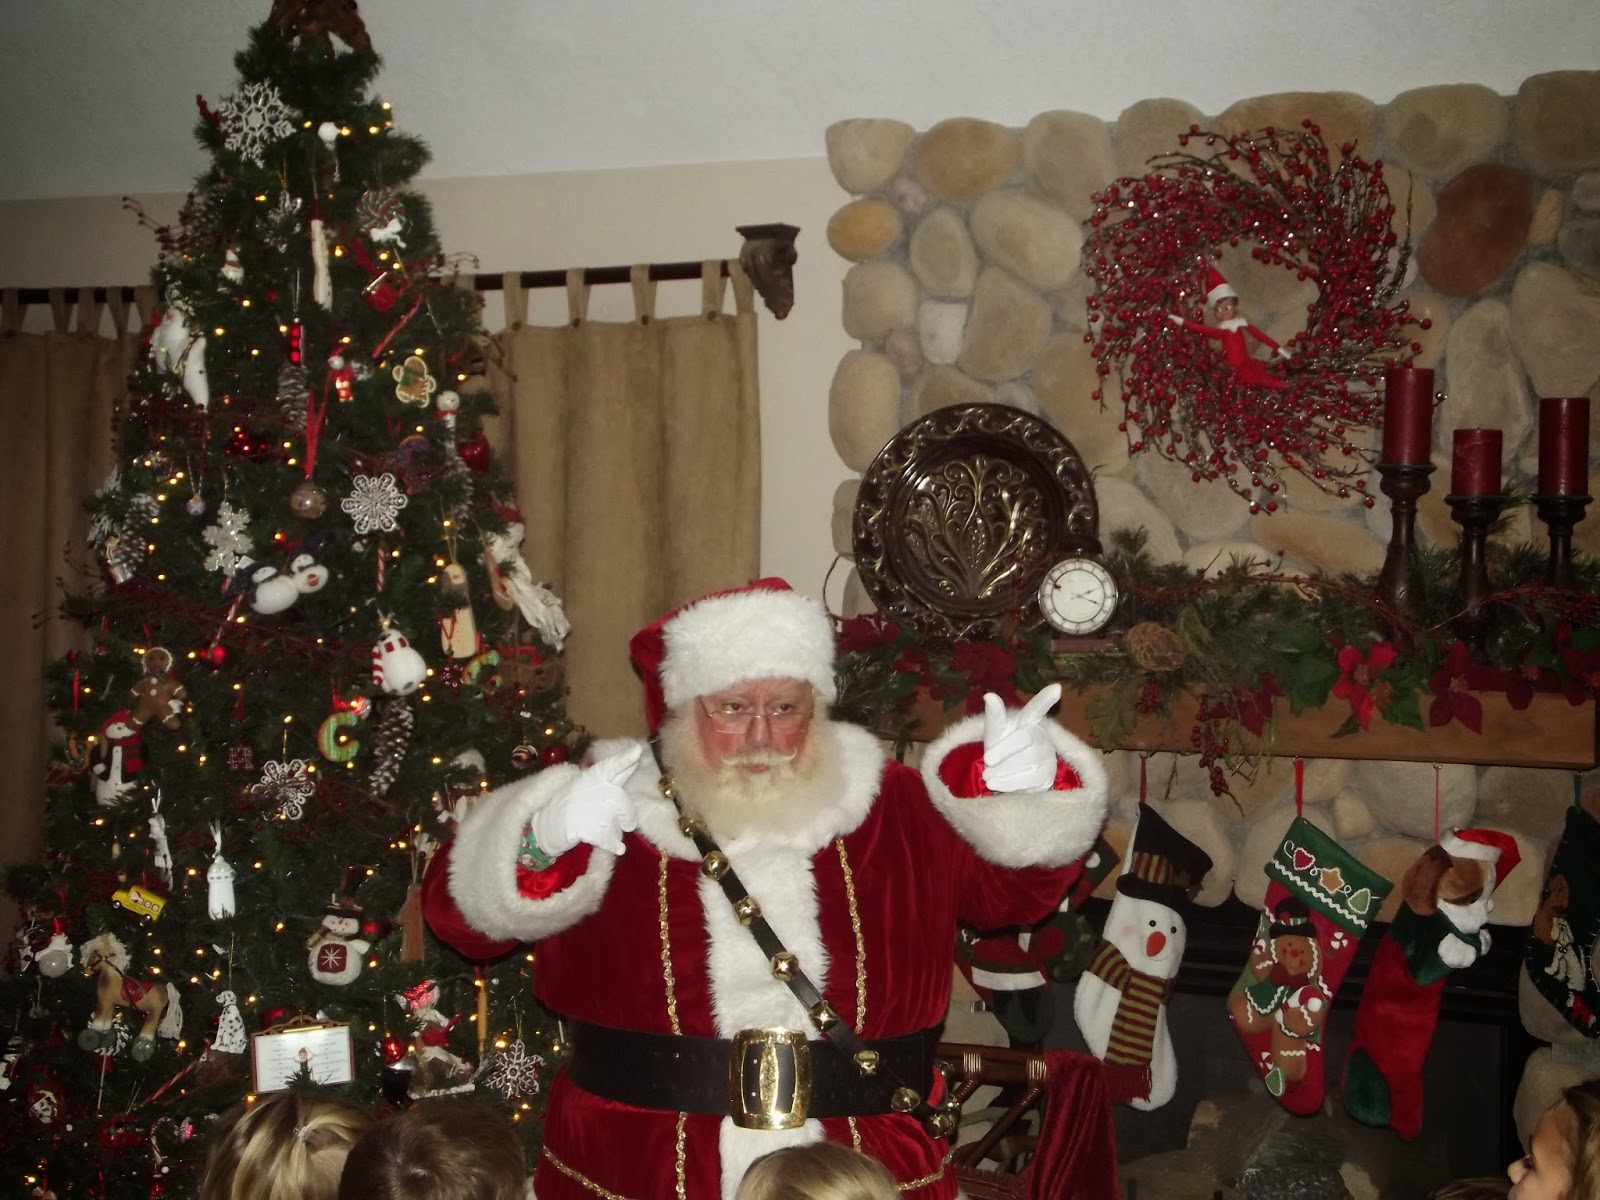
 And promptly at 8PM....Santa let himself in....rang is bells and said "Ho! Ho! Ho!" all of the way up the stairs....these kids about had a fit....what an amazing moment for all....

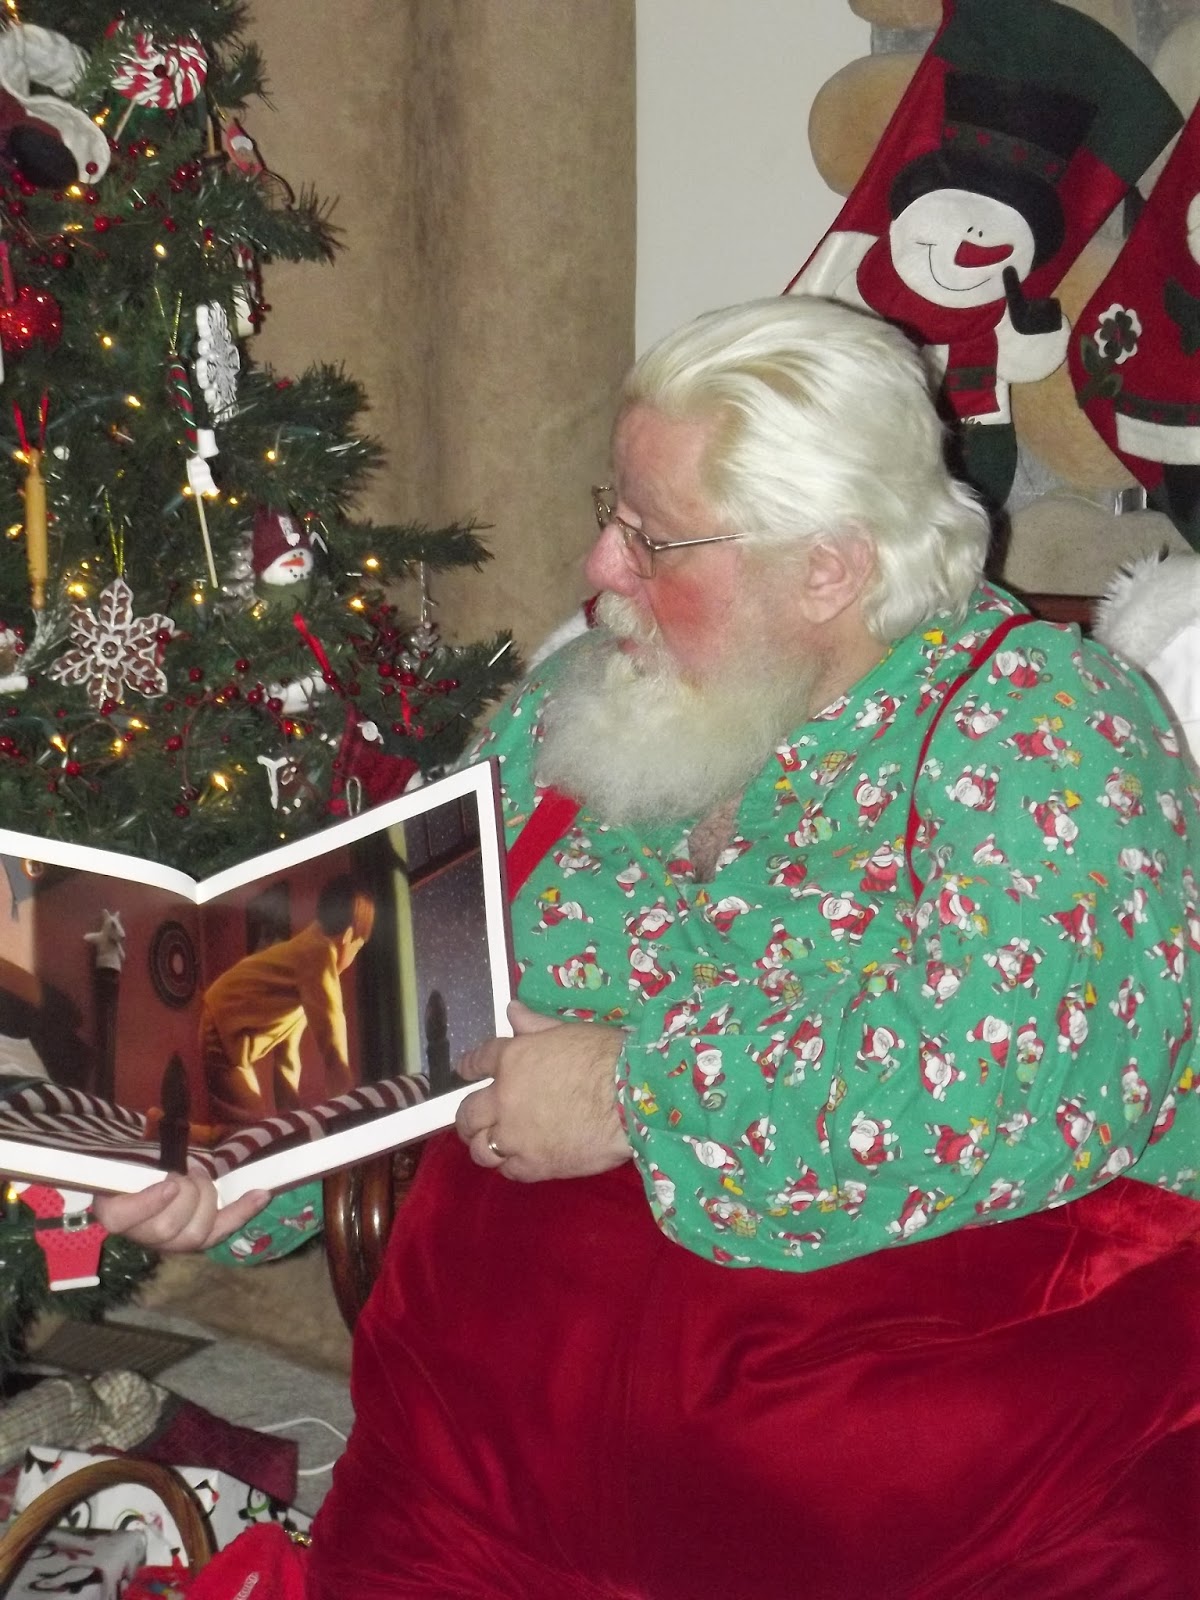
 And then our dear Santa gathered all the children around him and read The Polar Express to all of us...it was amazing the attention he commanded and received.
 All of the kiddos with Santa!!
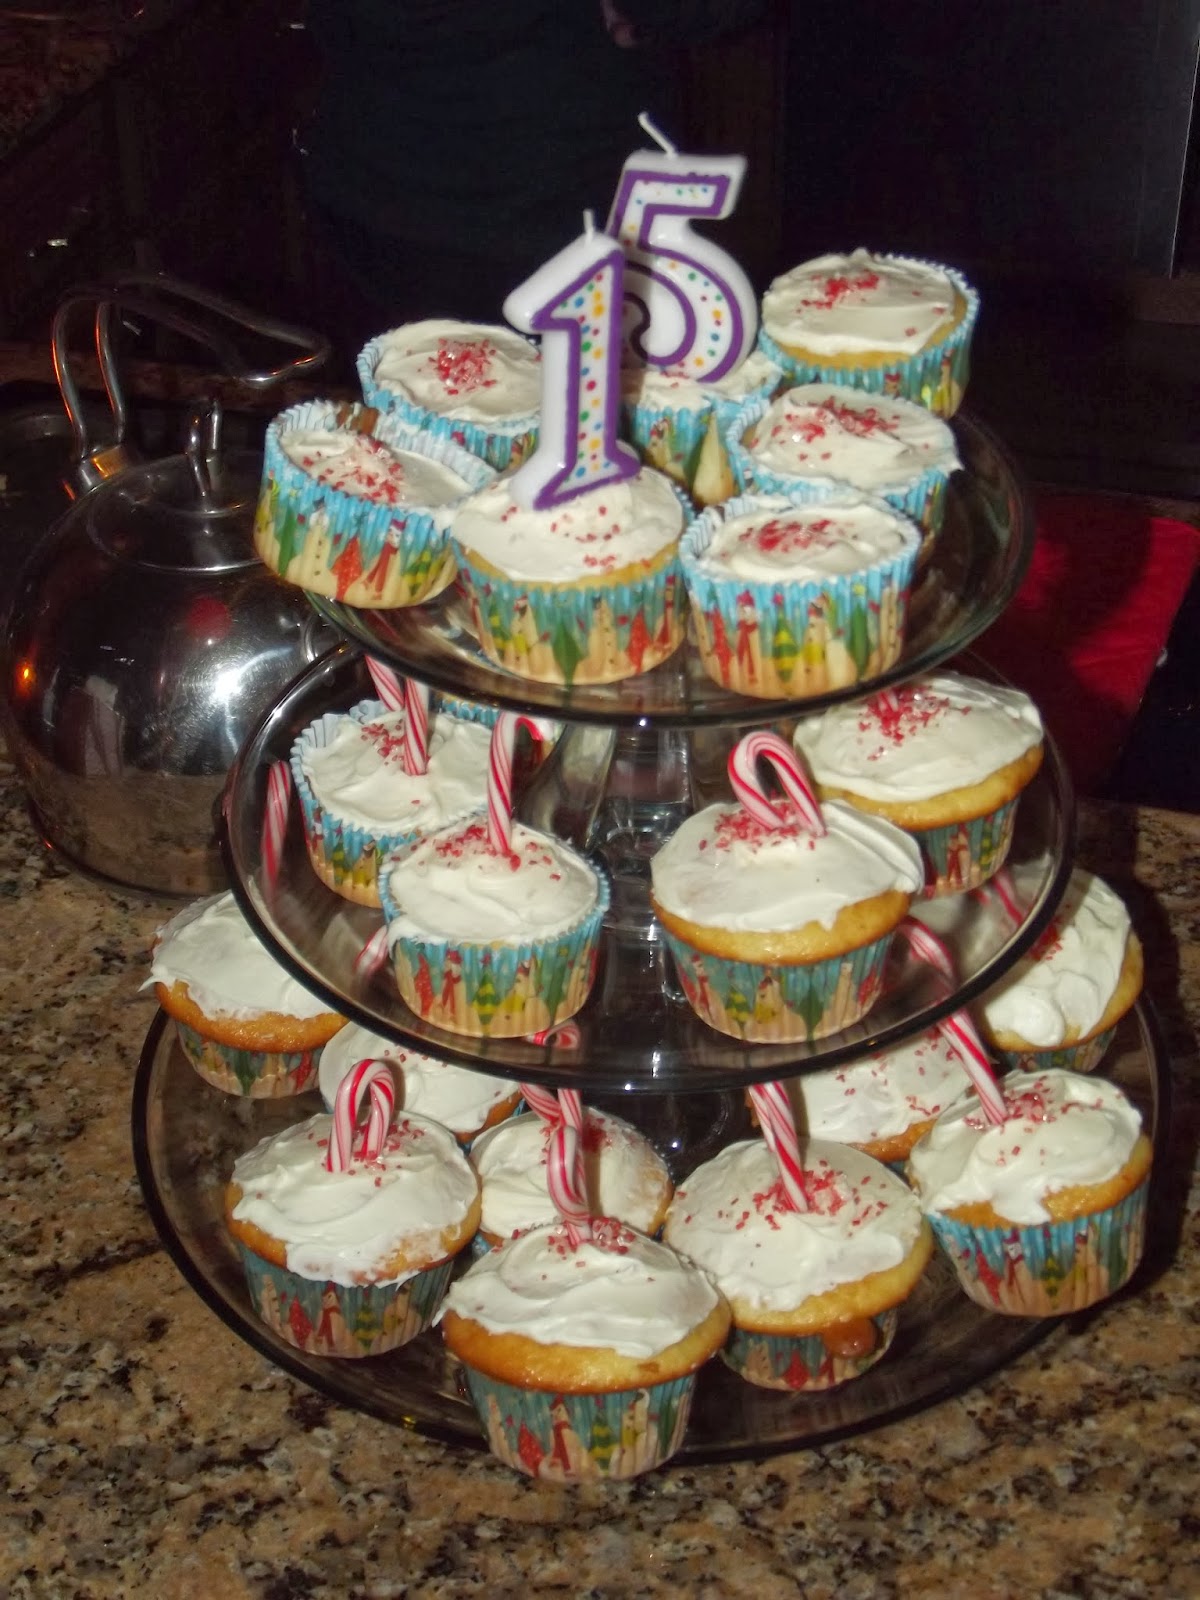
 After the story, Santa handed out my wrapped gifts....really they were just typical party favors...every child received a silver bell (that only rings for those who believe :)) a small wooden train, a train shaped lollipop, a captains hat, a christmas cupcake and some candy....but, they thought it was wonderful.....such a beautiful mess!!


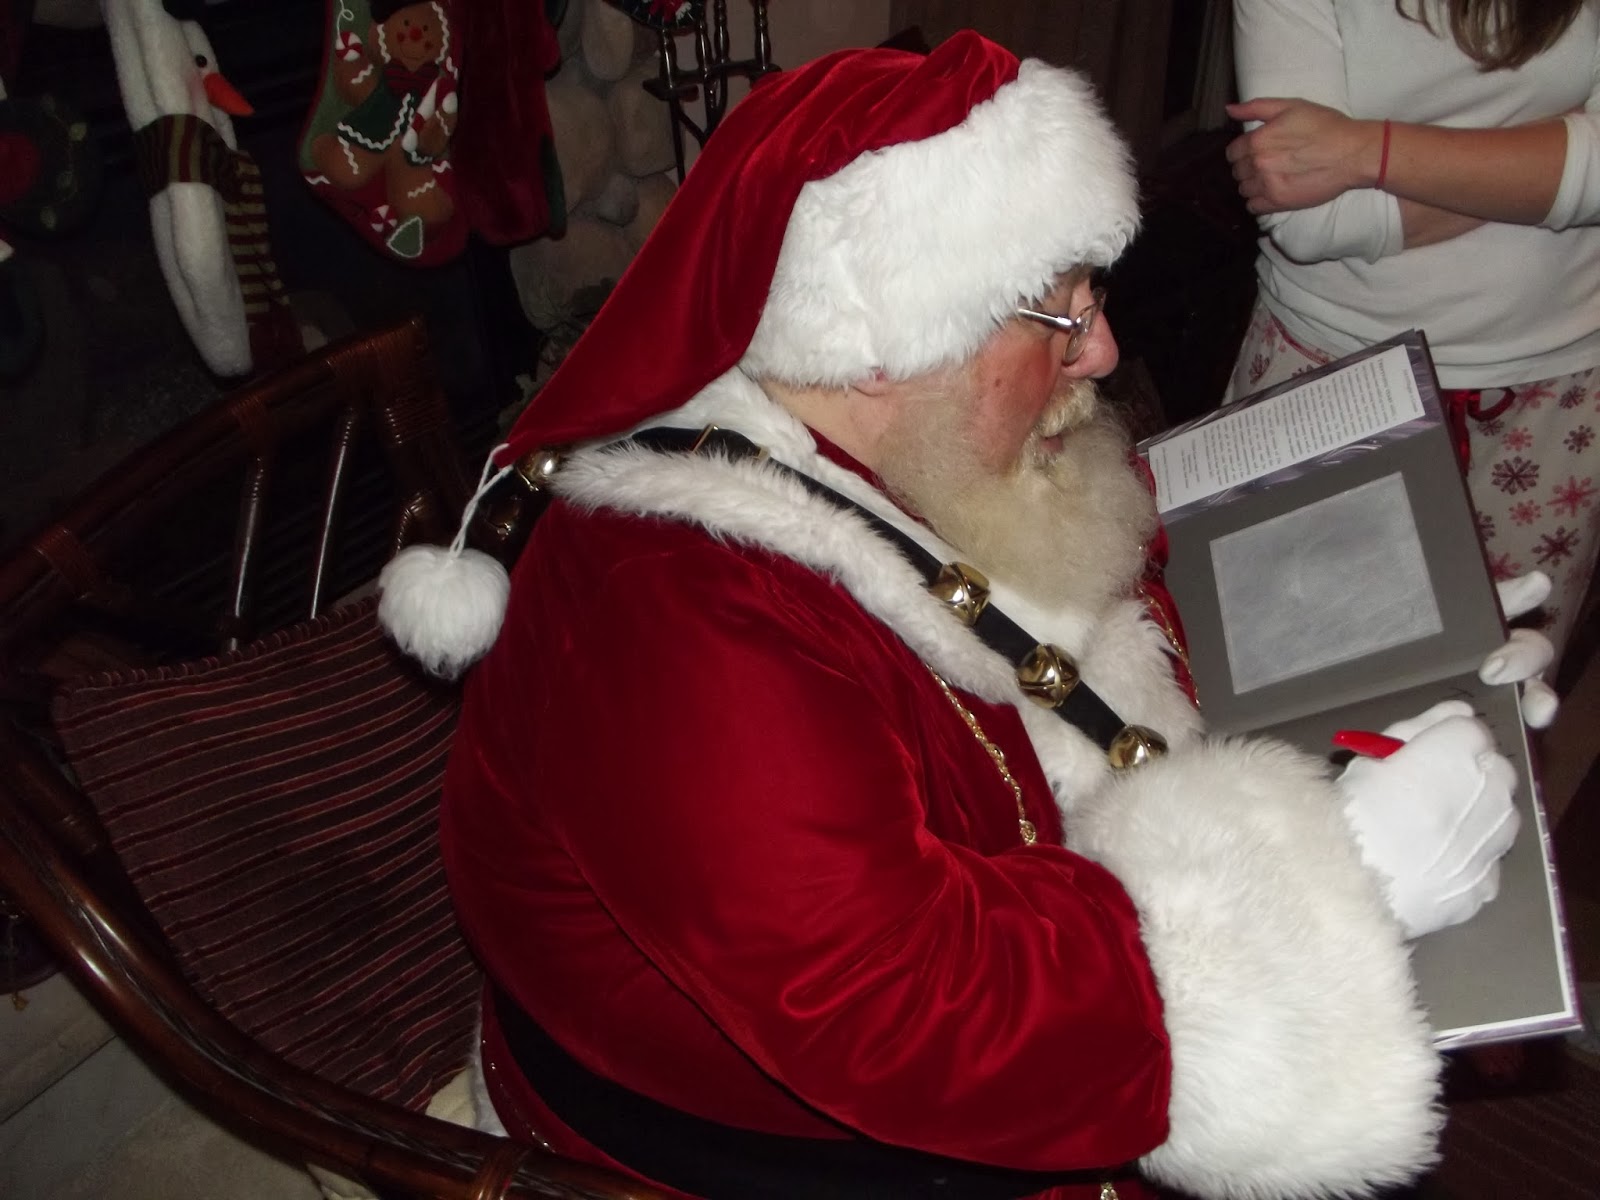
 Santa signed our copy of the book for memories down the road.....
This was a beautiful party and I think it was truly enjoyed by everyone whether they were 1 or 81!! It was so simple to put together and incredibly affordable in comparison to other parties I have shown!!

I hope you have enjoyed this pictorial of our special birthday party!!

Monday, December 2, 2013

My Puff Quilt Tutorial


<a href="http://www.bloglovin.com/blog/11371563/?claim=ft84bynksbp">Follow my blog with Bloglovin</a>


Hello there!! So, a couple of weeks ago I posted a picture of the puff quilt that I finally completed for my almost five year old's firetruck and dalmatian bedroom on google. I actually had a few people comment that they would like a pattern for the quilt. I, however, do not have a pattern to share because I just kind of made this up as I went along. So, with that said, I thought that I would do yet another first and try a tutorial for how I made it. And, since I had some left over pillows and a rocking chair that I have just refinished, I am going to show you how I made the quilt on a very small scale....I am going to make a cushion for the rocking chair. The quilt can be made as big or small as you care to make it. The original quilt was made for a super twin bed and frankly, I used a super twin sheet as my guide and as the backing for it.

First things first....I feel that it is only fair that I put in a couple of disclaimers before I get started....
1. This is my first tutorial on my very new blog....so, please feel free to comment away and point me in the right direction!!
2. I have two small children, two dogs, a husband and a full time job....basically, my life is sometimes like watching the Three Stooges.....it took me a long time to get this quilt complete....longer than it really should have because of all the interruptions.....however, if I were to take all of the pockets of time that I dedicated to it, it probably really took me two weeks working full time....so, about 80 hours....which is a lot, and, there are probably easier and other ways of doing this, but, this is what worked for me and seemed easiest at the time.


OK...with that said, lets get started!!

I had nine total fabrics that I worked into the design of my puff quilt. I only bought one yard of the designer fabrics and two yards of the more inexpensive fabrics. I started out by cutting the fabrics into five inch squares. I also bought muslin for the backs of the pillows since I realized after doing a couple that the backside wouldn't be seen and the muslin was so inexpensive. The muslin was cut into four inch squares. I now know that if I had used a rotary cutter, this would have been a much easier task, however, being the novice that I am....I cut each and every square, row by row.....could have probably saved some time there.....(told you that I am learning!! :)
Here is the front and back of the pillow.


 After I had all of my pieces cut, I pinned the corners of the fabric and the muslin together and then made pleats (just folded over the excess) in the middle on three sides, leaving the last side open.


I then sewed the three sides together and stuffed the pillow with fluff. I used a lot of fluff....I want to say that I went through five bags of it....but, joannfabric.com always has coupons for when it wasn't already on sale....needless to say, I used a lot of coupons....

Here is one of the many bags of "fluff"

After stuffing the pillow with the fluff, I sewed the final side together creating the final pleat and now you have one pillow....you only have to do this about 399 more times, depending on the size of your puff quilt!! 
Now, I have to admit that I am one who gets bored looking at the same fabric, so, I kind of bounced around and sewed about 35 pillows of each fabric, separated them into boxes and then started putting them together. I would go back to making pillows when I started to run low, but, I just got bored making them which inevitably deterred me from my project....do it however it works for you.....

So, lets put these pillows together. Since they are all the same size, they line up quite easily. And, I did just that. I layed my pillows on the floor, made sure that I liked how the different fabrics lined up, made sure that there weren't two of the same fabrics touching each other or at least not directly in the same line and pinned them together. For the big quilt, my rows ended up being 15 pillows wide. For this cushion, it is only 6.


Here is the leftover pillows that I didn't use for the quilt....hence, the cushion :) But, yes, I had nine diaper boxes filled with little pillows at one point.

Now, that you have it pinned your first row together, go ahead and sew the individual puffs together one at a time so that you have created a row. 
Once I had completed one row, again, I would lay it on the floor and line up my next row, pin the pillows together and then sew them together.
When you have several rows sewn, you can start putting them together. With right sides together just match the centers and corners of each row and pin and sew.
The quilt did get very heavy after I had about ten rows sewn together. I learned quickly that it was easier to sew four or five rows together first, then attach it to the bigger piece. I fought it at first, but, it was certainly easier to do it in sections than to fight the weight....

Ok....so, you have your rows all sewn together.....now what?? I wondered that, too....I spent some time with a nice woman at the fabric store who had been quilting for a long time. She told me that I could use a fabric adhesive to baste the batting on instead of hand basting.....that sold me on this stuff!! And, it works just fine. It does get a bit gummy on your hands, but, washes off easily.
I cut the batting (they actually make batting for quilts in bedding sizes--I didn't know that--and since my boys bed is a super twin, I bought the full size batting and cut it down) to size and sprayed one foot sections at a time smoothing the batting over the quilt and making sure there weren't any air pockets. I did have to hit the corners again before adding the back to the piece.
Remember that I am using left overs for the cushion...thats why the batting is in two pieces here.
 With the batting secure, I cut the sheet to fit the length and width of the quilt. For this cushion, I just used a left over square of red fabric for the back. I used cotton quilt binding to attach the front to the back. In the picture below, I am using the satin blanket binding. It is your choice as to how you finish your quilt. I have to be honest, I have never done finish work before, and if there is anything that I would redo on my quilt (or cushion, for that matter) is the finish....I need a class as to how to make this a bit more professional looking. And, in my spare time (yeah, right!!) I will probably in all honesty redo the finish work on both of my pieces.


I certainly hope that you found this helpful. Like I said at the beginning, this is my first time doing a puff quilt (or any quilt for that matter) as well as a new blog and a new tutorial....Please feel free to comment and point me in the right direction, critique, and ask questions....I really welcome and appreciate the feedback!! 

Thanks for stopping by!!