Let me tell you a little bit about why I love this paint so much...I originally bought my first bag of milk paint because in the Pinterest world, it was all the rage. Because I primarily paint furniture intended for children, I was immediately attracted to the fact that there were no chemicals in it. No chemicals is a very good thing. Milk paint is mostly made of milk proteins, clay, limestone and natural pigments. So, not that you should eat your milk paint, but, if your teething child decides to chew on his dresser, I think he will pull through...
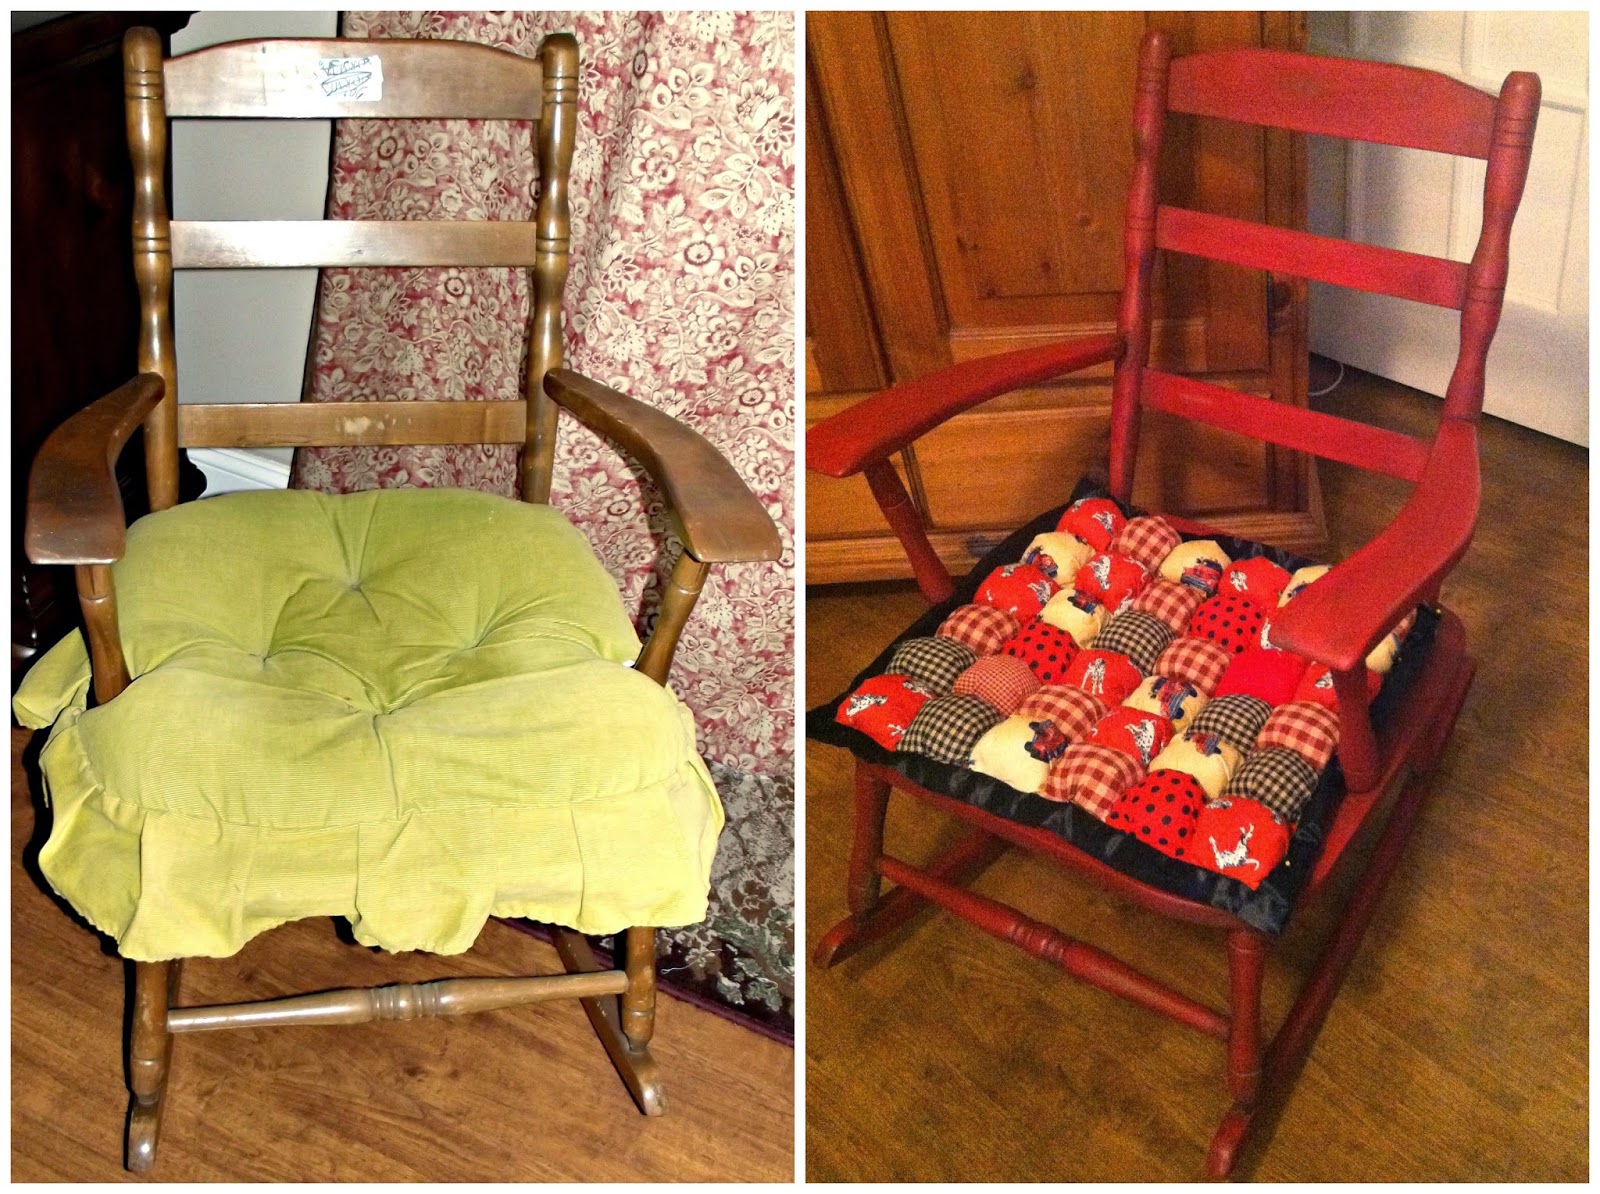
Now, my love was not immediate....when I got that fist bag (yes, it comes in a bag) of paint, I thought well, what the heck am I supposed to do with this? So, I watched a few You Tube tutorials on how to mix it....and, frankly, none of the videos made it seem like it was particularly precise...you know, kind of like the difference between cooking (where you just toss some spices and herbs in the pot) and baking (where every measurement has to be exact). So, I got out a styrofoam cup, a measuring spoon, warmed up my water and mixed it up. And, it was a clumpy mess. So, I added a bit more water....and, it became a watery clumpy mess. The paint just didn't have the consistency that I would associate with paint. It wasn't smooth. It was grainy looking. It looked....wrong!! But, impatient as I tend to be with these things, I dipped my paint brush in and painted my little rocking chair that I had. The paint moved easily over the wood. It dried quickly. But, the magic didn't happen until I sanded that first coat. After sanding, this little chair started to look pretty good. So, I painted another coat, sanded again and.....it was so pretty!! The sanding is a lot of work, I'll be honest, but, you can sand milk paint down to the point that it feels like glass!! Here is my first little chair....


Thank goodness that I found a paint that works for me!! Have you tried milk paint yet? Tell me what your thoughts are....do you love it or are you a chalk paint lover? I'd love to hear what you have to say!!
Thanks for reading:)
Rachael
